Power Sled Push
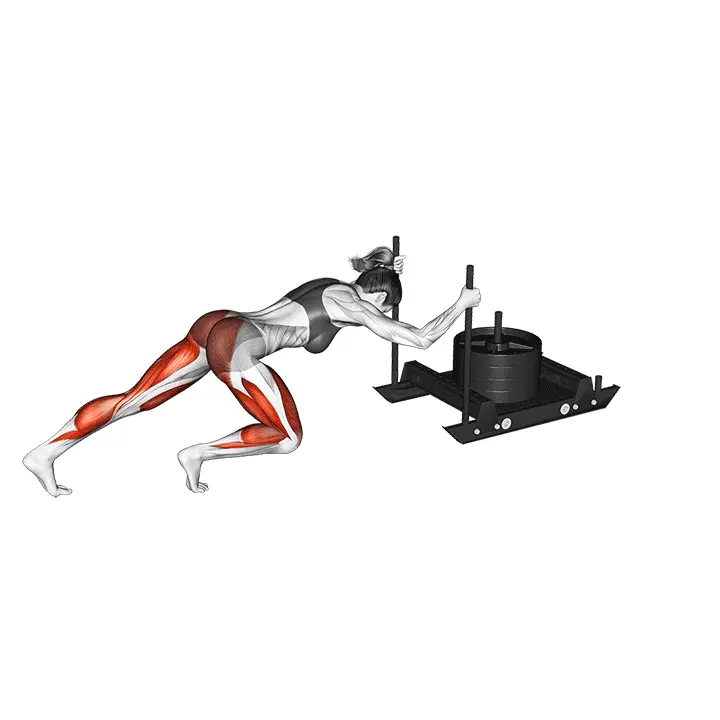
Power Sled Push is a sled push that focuses on the quadriceps and lower body strength production. The movement develops acceleration, leg pushing power, and athletic performance. It is suitable for both strength and conditioning training.
AI Analysis
Required equipment
Why Power Sled Push?
The power sled push is one of the most effective movements for developing explosive strength and endurance in the lower body. In this functional exercise, you push a weighted sled forward, which particularly challenges your quadriceps, glutes, and calves. The movement is an excellent way to enhance the body's ability to produce power quickly, which is crucial in many sports, such as running, jumping, and combat sports. It significantly improves your acceleration and leg pushing power, making you a more athletic and efficient mover. The power sled push is suitable for almost all fitness enthusiasts and athletes, from beginners to experienced individuals. Its resistance is easy to scale by adding or removing weight plates from the sled, allowing you to customize the movement to your own goals and fitness level. The exercise is effective both as part of strength training for building maximal strength and as part of high-intensity interval training (HIIT) or endurance training, burning a significant amount of calories and improving anaerobic capacity. It helps you build not only raw strength but also body control and coordination, as the movement requires a stable core and timely leg work. Add the power sled push to your workout program and feel the difference in your performance!
Benefits
Develops explosive acceleration.
Effectively increases leg pushing power.
Improves overall athletic performance.
Significantly strengthens the quadriceps and glutes.
Builds muscle mass and strength in the entire lower body.
Enhances anaerobic endurance.
Burns calories and boosts metabolism.
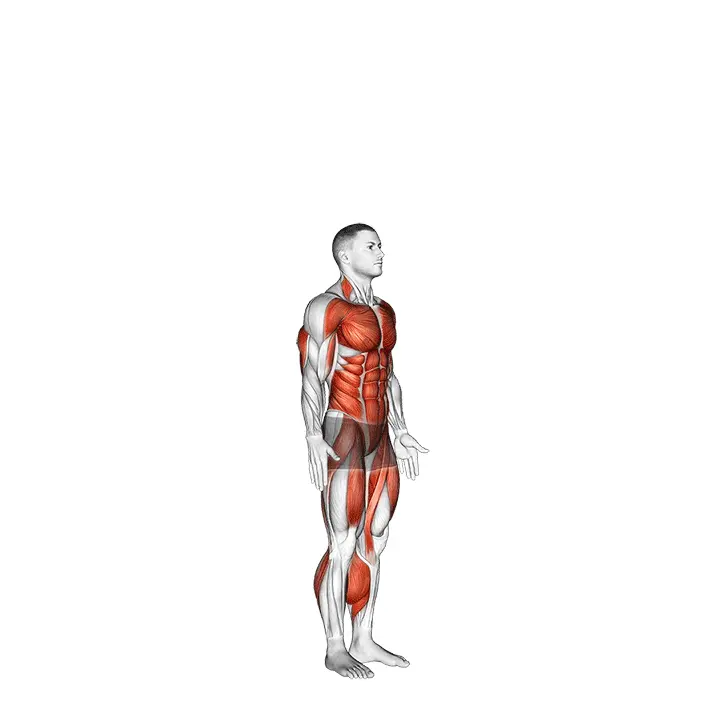
Muscle groups
Primary
- quadriceps10
- quadriceps10
Secondary
- gluteal8
- gluteal8
- calves6
- calves6
Stabilizers
- hamstring5
- hamstring5
- abs6
- obliques5
- obliques5
- lower-back4
- deltoids3
- deltoids3
- triceps2
- triceps2
How to perform
Setup
- Adjust the total weight on the sled; start light and increase the load while maintaining good technique.
- Position yourself behind the sled in a low, forward-leaning stance: arms straight or slightly bent on the push handles, core tight.
- Place your feet hip-width apart, heels lightly on the ground and weight on the balls of your feet, gaze 1-2 meters ahead at the floor.
Execution
- Start the push by generating force from the balls of your feet and extending your knees and hips forward powerfully.
- Take short, effective steps while keeping your hips low and your upper body strongly leaning forward.
- Maintain a steady pace and breathe rhythmically: exhale during the push, inhale during the recovery phase between steps.
Coaching cues
- •Lock your core – keep your sides tight, do not let your lower back sag.
- •Knees forward and out in line with your toes; the push comes from the thigh, not just the calf.
Common mistakes
❌ Rounding the back.
Why it's wrong: When the back rounds, pressure is incorrectly placed on the lower back, and the effectiveness of the movement on the quadriceps decreases. This can lead to injuries.
✓ Fix: Keep your core tight and your back in a natural position, nearly straight. Imagine pushing your hips forward.
❌ Too upright position or too short steps.
Why it's wrong: An overly upright position or short steps reduces activation of the quadriceps and glutes and limits power production.
✓ Fix: Lean slightly forward against the sled and take long, powerful steps that utilize the full range of motion of the leg.
❌ Looking down.
Why it's wrong: Looking down at the floor can lead to improper positioning of the head and neck, affecting the alignment and balance of the entire body.
✓ Fix: Keep your gaze about 1-2 meters ahead of you to maintain a neutral neck position and optimal body alignment.
❌ Too light or too heavy load.
Why it's wrong: A load that is too light does not develop strength sufficiently, while a load that is too heavy compromises technique and increases the risk of injury.
✓ Fix: Start with a load that allows you to maintain good technique and a strong, controlled push. Gradually increase the load as you progress.
Frequently asked questions
How often should I do the power sled push?
It depends on your goals. For strength development, 1-2 times a week with heavy loads is sufficient. For improving endurance or general fitness, you can include it in your program 2-4 times a week with lighter loads and longer working times. Remember to give your muscles time to recover.
What muscles does the power sled push primarily develop?
Primarily, the movement strengthens the quadriceps and glute muscles. It also effectively activates the calves, hamstrings, and core muscles, which are involved in body stabilization and power transfer. Thus, the movement is excellent for developing the entire lower body.
Is the power sled push suitable for beginners?
Yes, absolutely! Although it is an effective movement, its resistance is easy to adjust. Beginners can start with a light sled without additional weights and focus on technique. Once the technique is mastered, weight can be gradually increased. It is a low-impact exercise, making it joint-friendly.
How do I adjust the resistance of the power sled push?
Resistance is adjusted by adding or removing weight plates from the sled's weight bar. The more weight you add, the heavier the push becomes. You can also affect the resistance with the friction of the surface – a rubber mat or artificial turf provides more friction than a smooth floor.
Safety tips
- Always start with a light load and ensure proper technique before adding weights.
- Keep your back in a natural position and your core tight to avoid lower back strain.
- Wear supportive and gripping footwear that provides good traction on the surface.
- Warm up thoroughly before the workout and cool down afterward.
- Listen to your body and stop if you feel pain.
Tags
Train smarter with AI coaching
Tsemppi's AI gives you exact weights and reps for every workout. Progress every single session.
Start your free 7-day trial✨ Limited spots available • No credit card required