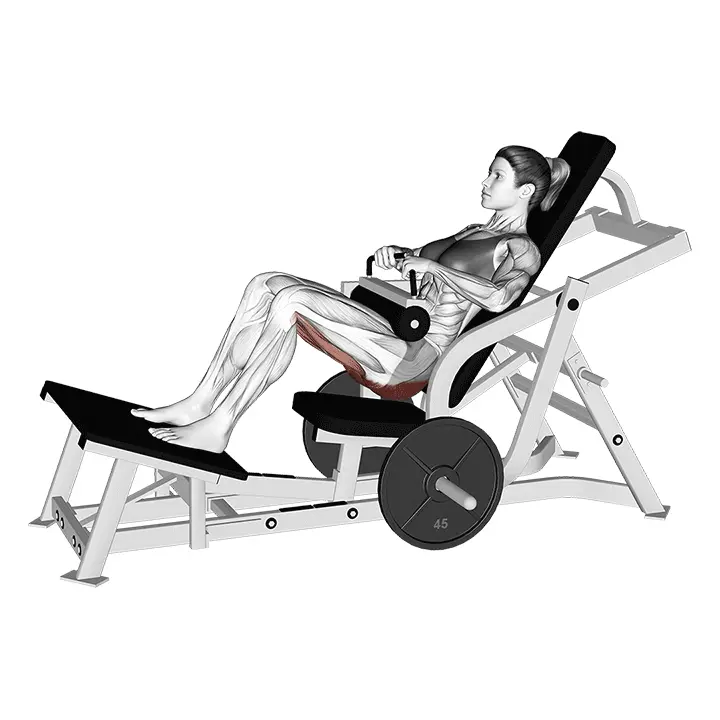
Lever Hip Thrust
The hip thrust performed on a machine effectively targets the glutes and hamstrings while minimizing the load on the lower back. The range of motion is guided and safe, making the exercise suitable for both beginners and experienced individuals. An excellent choice for developing glute strength and mass.
AI Analysis
Required equipment
Why Lever Hip Thrust?
The lever hip thrust, or more commonly the machine hip thrust, is one of the most effective and lower back-friendly ways to develop the glute muscles. This movement directly targets the gluteal muscles and hamstrings while minimizing lower back strain, which is a common concern in many other glute exercises. Its guided range of motion and stable structure make it an excellent choice for both beginners learning glute activation and more experienced trainers looking to safely lift heavy weights. The main benefit of this movement is its ability to build strength and muscle mass in the glutes. Strong glutes not only look good but are also critically important for various athletic performances, such as running, jumping, and squatting. Additionally, they support pelvic stability and help prevent lower back pain by improving overall body posture. The machine hip thrust allows you to focus entirely on the work of the glutes without having to balance a barbell or your own body. The machine guides the range of motion and ensures that the load is directed to the right muscles. By using padding or a hip protector, you can comfortably and safely lift heavier weights. This makes the movement an excellent choice for anyone aiming for rounder, stronger, and more functional glutes. Whether you are building strength, increasing muscle mass, or improving athletic explosiveness, the lever hip thrust is an invaluable addition to your workout program.
Benefits
Effectively strengthens the glute muscles.
Develops mass in the glutes and hamstrings.
Improves athletic performance.
Reduces lower back strain.
Guides a safe range of motion.
Supports pelvic stability.
Shapes the glutes to be rounder and firmer.
Muscle groups
Primary
- gluteal10
- gluteal10
Secondary
- hamstring7
- hamstring7
- quadriceps4
- quadriceps4
Stabilizers
- lower-back3
- abs4
- obliques3
- obliques3
- calves2
- calves2
How to perform
Setup
- Adjust the lever machine's seat and back support so that your shoulders are against the support roll and your knees are at about a 90-degree angle at the top position.
Execution
- Press through your heels into the platform and push your hips upward until your body forms a straight line from knees to shoulders. Squeeze your glutes at the top position for 1-2 seconds.
- Lower yourself down in a controlled manner, maintaining a slight posterior pelvic tilt and keeping your lower back neutral. Do not let the weights crash down before the next repetition.
- Repeat the movement at a controlled tempo (e.g., 2 seconds up, 3 seconds down) for the desired number of repetitions.
Coaching cues
- •Keep your chin in a neutral position and your gaze slightly forward, do not overextend your lower back at the top position.
- •Active glute squeezing directs the work to the glutes, avoid pushing too much with the lower back or quadriceps. A fingertip feel in the glutes can help with activation (if possible).
Common mistakes
❌ Incorrect foot positioning
Why it's wrong: Feet that are too far away or too close can shift the load to the hamstrings or lower back and weaken glute activation.
✓ Fix: Adjust your feet so that your knees are at about a 90-degree angle at the top position of the movement. The soles of your feet should be firmly on the ground.
❌ Excessive hip extension
Why it's wrong: Overextending the hips beyond the natural range of motion causes the lower back to arch and unnecessarily loads the spine, while reducing tension in the glutes.
✓ Fix: Stop the movement when the hips are fully extended and the glutes are squeezed, but without overextending the lower back. Keep your abdominal muscles lightly engaged.
❌ Too fast or uncontrolled movement
Why it's wrong: Rapidly lifting and lowering the weight weakens effective muscle activation and increases the risk of injury. The movement becomes more based on momentum than muscle work.
✓ Fix: Perform the movement in a controlled manner, focusing on the muscle feel. Lift the weight explosively and lower it slowly and in a controlled manner.
Frequently asked questions
How often should I do the lever hip thrust?
Generally, 2-3 times a week is a good goal for developing the glutes. Allow your muscles sufficient time to recover between workouts, about 48-72 hours. Listen to your body and adjust the frequency based on your goals and recovery ability.
Do I always need a pad under the bar?
Yes, a pad or hip protector is highly recommended and practically essential. It prevents discomfort and bruising from the pressure of the bar on the hips, allowing you to focus better on performing the movement itself and achieving effective glute activation without pain.
Can this movement be done without a lever machine?
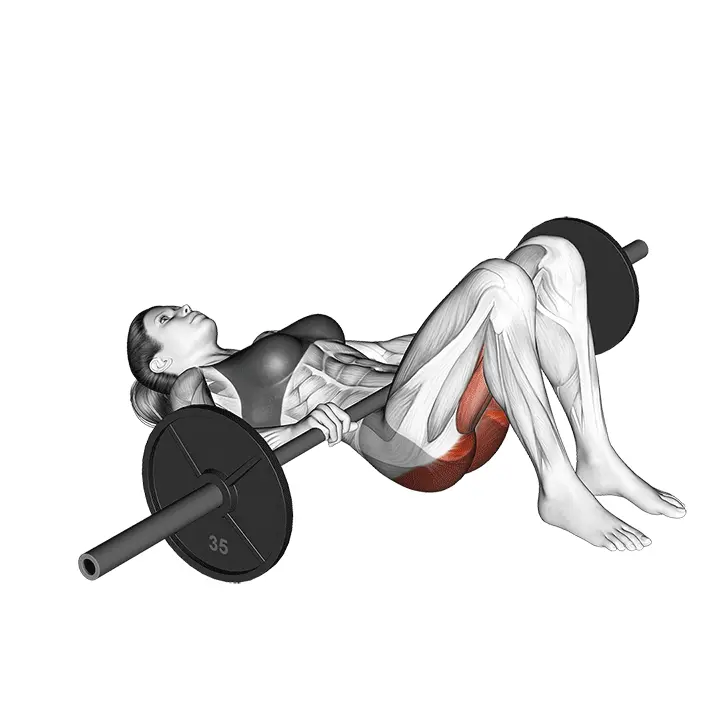
Yes, but then it is referred to as the traditional hip thrust. It is usually performed using a bench or platform, with a free barbell or dumbbells. However, the lever machine provides a guided and often more stable range of motion, which can be more effective with heavy weights.
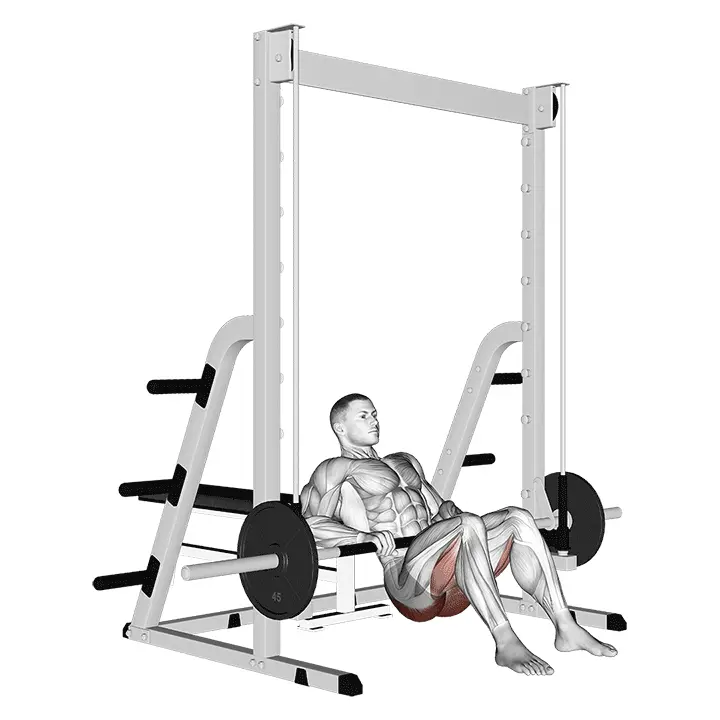
What is the difference between the lever hip thrust and the glute bridge?
The glute bridge is typically performed on the floor and has a shorter range of motion. In the lever hip thrust, the back support is elevated, allowing for a greater range of motion and more effective stretching of the glutes at the bottom position and squeezing at the top position. The lever machine makes the movement even more controlled.
Safety tips
- Ensure that the lever machine is properly adjusted to your body height and position before adding weights.
- Always use padding or a hip protector between the bar and your hips to prevent pain and bruising from pressure.
- Start with light weights and ensure proper technique before increasing the load. Do not sacrifice technique for heavier weights.
- Keep your gaze forward or slightly downward to maintain a neutral neck position throughout the movement.
- Warm up well before heavy sets and stretch after the workout to improve mobility and recovery.
Tags
Train smarter with AI coaching
Tsemppi's AI gives you exact weights and reps for every workout. Progress every single session.
Start your free 7-day trial✨ Limited spots available • No credit card required