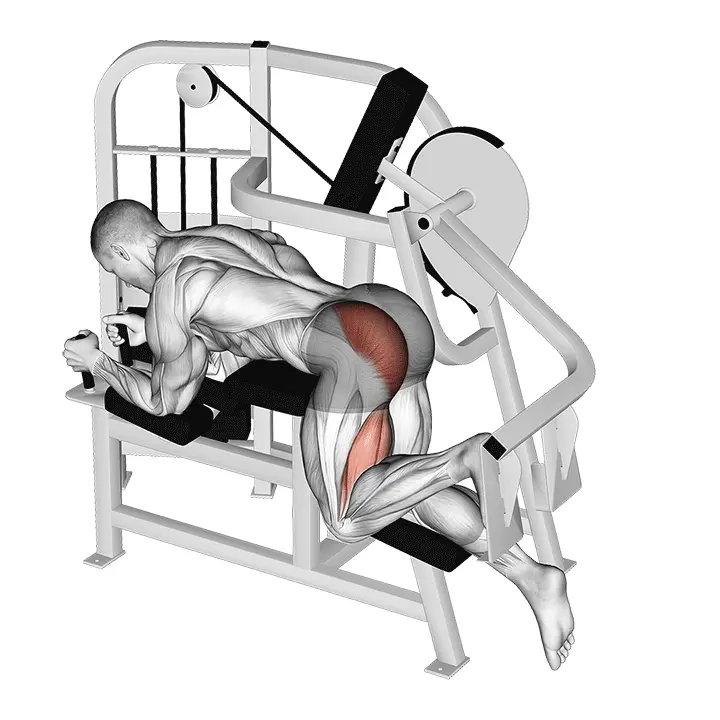
Lever Hip Extension
Lever Hip Extension is a machine-based hip extension where the push occurs through the pelvis. This movement strengthens the glutes and hamstrings while improving hip control and strength.
AI Analysis
Required equipment
Why Lever Hip Extension?
The lever hip extension is an excellent and effective machine exercise specifically designed to strengthen the gluteal muscles and hamstrings. This movement is ideal for beginners, as the machine safely guides the movement and helps focus on proper muscle activation without a high risk of injury. The main focus of the movement is on hip extension, meaning pushing the pelvis backward against resistance, which effectively activates the gluteus maximus muscle, the largest and strongest muscle in the body, while also supporting the hamstrings. The exercise not only shapes and strengthens the glutes but also significantly improves hip control and functional strength. Strong glutes are key in many everyday movements, such as walking, running, and climbing stairs, as well as in athletic performances like jumping and sprinting. Additionally, they support the lower back and help prevent back pain, improving overall body posture and stability. Training on the machine allows for progressive resistance to be added safely and in a controlled manner, which is essential for muscle growth and strength development. Adjustable pads and supports ensure that the machine fits users of different sizes and allows for optimal movement execution. Therefore, the lever hip extension is a great addition to any gym program for beginners or as part of a more advanced workout, providing a solid foundation for lower body strength, functionality, and aesthetics. It helps develop isolated glute strength, which is often difficult to achieve with free weights, and effectively promotes muscle activation.
Benefits
Effectively strengthens the gluteal muscles.
Develops strength and endurance in the hamstrings.
Improves hip mobility and control.
Supports lower back health and posture.
Helps prevent lower body injuries.
Shapes and tightens the glute area.
Excellent for beginners.
Muscle groups
Primary
- gluteal10
- gluteal10
Secondary
- hamstring7
- hamstring7
Stabilizers
- lower-back5
- quadriceps3
- quadriceps3
- abs4
How to perform
Setup
- Adjust the lever and padding heights so that your pelvis is securely on the pad and the movement axis aligns with the hip joint.
- Place your chest and forearms against the support (or grip the handles) to keep your core stable.
- Bend the pushing leg at the machine's lever/arm with the ankle under the padding and the knee slightly bent. Keep the pelvis straight and your core tight.
Execution
- Inhale, tighten the glute, and push the lever back/up by extending the hip in a controlled manner until the glute is fully contracted without overextending the lower back.
- Hold at the top position for 1-2 seconds, squeezing the glute.
- Lower the leg slowly and in a controlled manner back to the starting position, maintaining the straightness of the pelvis and core support. Repeat the required number of repetitions and switch legs.
Coaching cues
- •The movement starts from the glute – avoid arching the lower back and twisting the sides.
- •Keep the pelvis stable and direct the knee forward; do not let the knee collapse inward (valgus).
Common mistakes
❌ Arching the lower back
Why it's wrong: The movement is often performed too much with the lower back, causing the load to shift from the glutes to the lumbar spine. This can lead to pain and injuries.
✓ Fix: Focus on keeping your core tight and your back in a neutral position. Actively squeeze your glutes at the top of the movement.
❌ Too much resistance
Why it's wrong: Using too heavy a weight can easily turn the movement into a swinging motion, taking the effectiveness away from the target muscles and increasing the risk of injury.
✓ Fix: Choose a weight that allows you to perform the movement in a controlled manner and feel the activation in the glutes. Focus on the mind-muscle connection.
❌ Incomplete range of motion
Why it's wrong: Performing the movement only partially limits the muscle's work and leaves some potential for development untapped.
✓ Fix: Take the movement to full extension, squeezing the glutes strongly at the top position and allowing the pelvis to slightly flex at the bottom position while controlling the stretch.
Frequently asked questions
How often should I do the lever hip extension?
Generally, 2-3 times a week is a good goal for developing the glutes and hamstrings. As a beginner, you can start with 1-2 times a week and increase frequency as your muscles adapt. Remember to give your muscles enough time to recover between workouts. Listen to your body.
Can this movement be done at home without a machine?
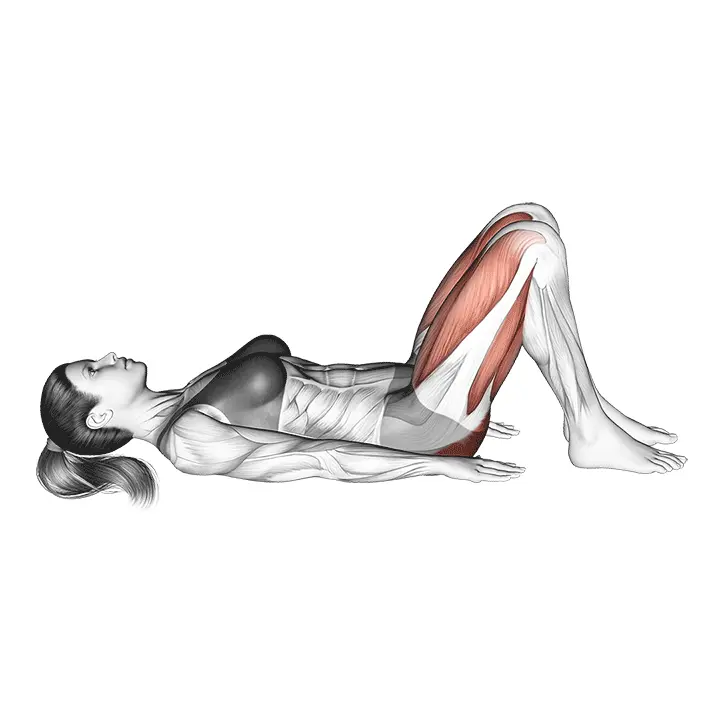
While the machine is the most effective, you can simulate the movement with a resistance band or bodyweight exercises such as a glute bridge or single-leg deadlift on the floor. However, these do not provide the same consistent resistance.
How can I ensure that my glutes are activating correctly?
Focus on squeezing your glutes strongly at the top of each repetition and hold briefly. Ensure that your lower back remains neutral and avoid swinging. You can try a lighter weight at first and focus on the feeling.
Is the lever hip extension a good exercise for those with back pain?
Yes, it often can be. Since the movement is performed on a machine, it is controlled and supports the lower back better than many free weight exercises. Strong glutes can also help alleviate lower back strain. However, start with light weights and ensure that the movement does not cause pain.
Safety tips
- Always adjust the machine to fit your measurements before starting the exercise.
- Start with a light weight and focus on perfect execution technique before adding resistance.
- Keep the movement controlled and avoid jerking or using momentum.
- Do not excessively arch your lower back; keep your core tight throughout the movement.
- Listen to your body and stop if you feel pain.
Tags
Train smarter with AI coaching
Tsemppi's AI gives you exact weights and reps for every workout. Progress every single session.
Start your free 7-day trial✨ Limited spots available • No credit card required