Lizard Pose Stretching
Lizard Pose is a yoga position that opens the hip flexors, inner thighs, and glutes while improving hip mobility. It is suitable for warming up or restorative stretching, especially for hips stiffened by sedentary work.
AI Analysis
Required equipment
Why Lizard Pose Stretching?
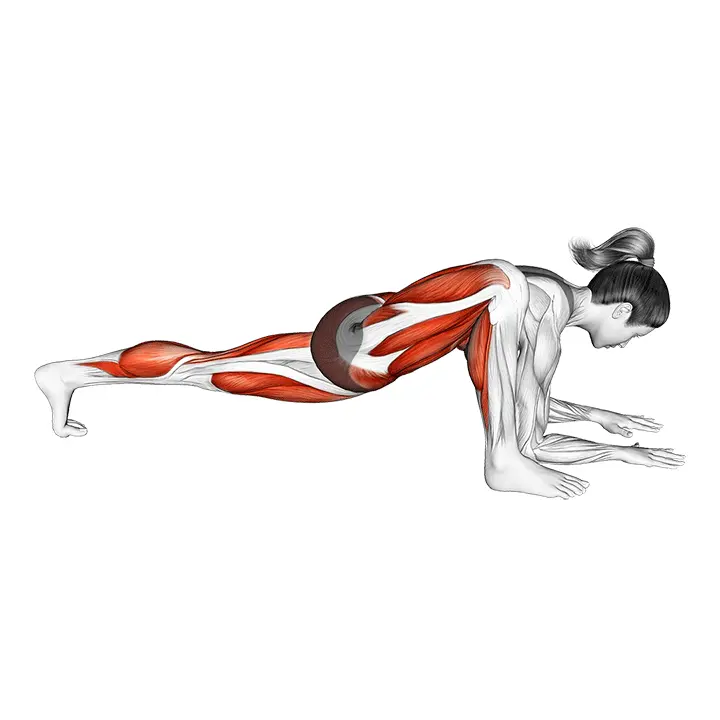
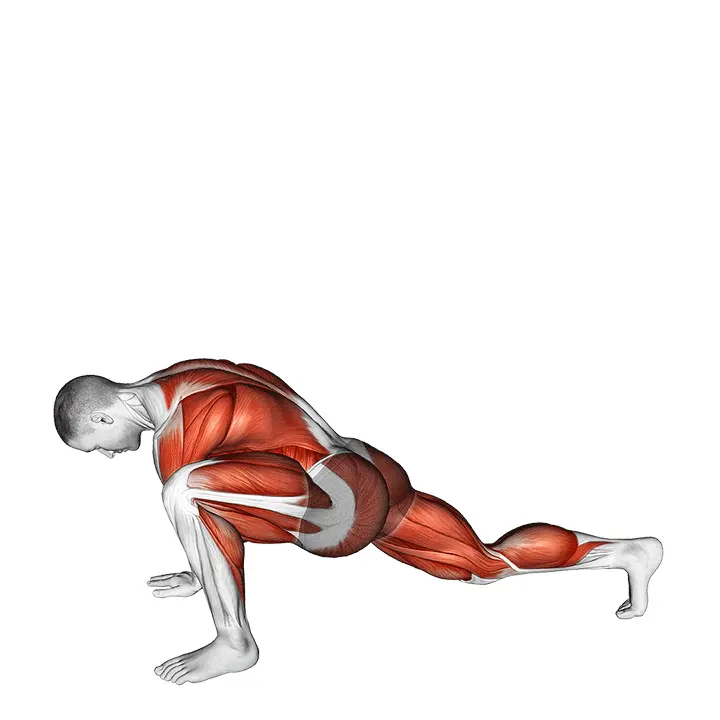
Lizard Pose, or Lizard Pose, is a deep stretch familiar in yoga, designed to open and release particularly the hip flexors, inner thighs, and glutes. This movement is a true lifesaver for many, as it directly addresses the challenges posed by modern sedentary work and lack of exercise. When we sit for long periods, our hip flexors shorten and stiffen, which can lead to lower back pain, poor posture, and limited mobility in daily life and sports. Lizard Pose is effective because it targets these tight areas in a versatile manner. In the position, the front leg is wide beside the body, and the back leg is extended back, allowing the pelvis to sink deeply. This creates an intense but controlled stretch in the hip flexors and inner thighs while also activating and stretching the glute muscles. The movement significantly improves hip mobility, which is crucial for both athletic performance and daily activities—whether it's squatting, walking, or tying shoes. The movement is excellent for beginners due to its adaptability. You can adjust the depth of the stretch by lowering your forearms to the floor or keeping your arms straight. Using yoga blocks can support your hands if the floor feels too far away. Lizard Pose can be utilized for warming up before a workout—opening the body for upcoming movements—or for restorative stretching after a workout or as a separate mobility exercise. It is particularly recommended for anyone experiencing hip stiffness and wanting to improve their body control and overall well-being.
Benefits
Effectively opens the hip flexors.
Improves hip mobility and range of motion.
Reduces tightness in the inner thighs.
Relieves pressure and pain in the lower back.
Prepares the body for deeper stretches.
Promotes recovery and muscle relaxation.
Eases stiffness caused by sedentary work.
Muscle groups
Primary
- adductors7
- adductors7
Secondary
- quadriceps5
- quadriceps5
- hamstring4
- hamstring4
- gluteal6
- gluteal6
Stabilizers
- calves3
- calves3
- abs4
- obliques3
- obliques3
- lower-back3
- deltoids2
- deltoids2
- triceps2
- triceps2
How to perform
Setup
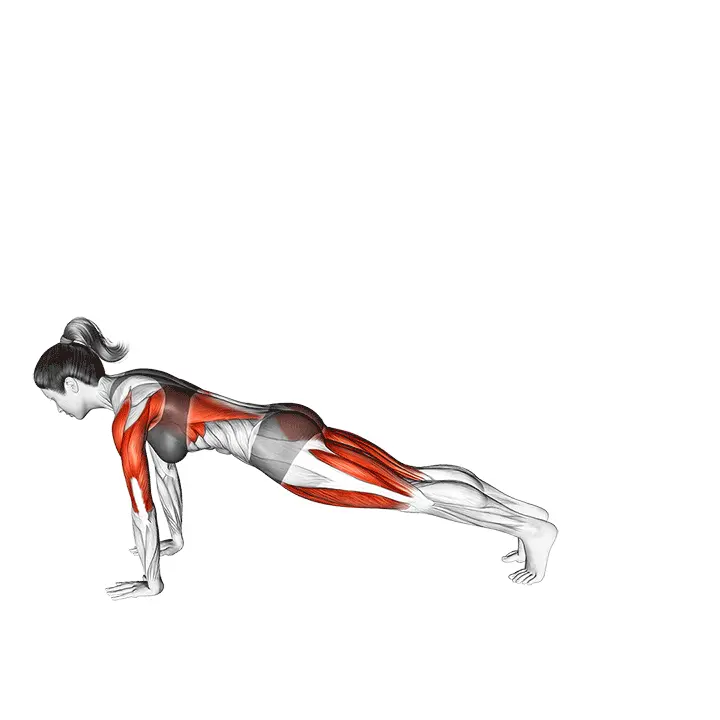
- Start from a plank position or downward-facing dog on the mat.
- Step your right foot outside your right hand; knee at about a 90-degree angle, toes slightly outward.
- Lower your left knee to the ground (or keep it up for a more advanced version). Keep the back foot's top or toes on the ground as comfortable.
Execution
- Lower your elbows towards the floor while keeping the chest long; you can lean on a yoga block if the floor is too low.
- Keep the pelvis low and direct it forward-down, with the spine long. Breathe deeply for 30-60 seconds.
- You can deepen the stretch by gently turning the right foot outward and shifting pressure to the inner thigh or bending the back leg's knee and grabbing the ankle (advanced).
Coaching cues
- •Keep your breath calm and guide the pelvis gently downwards with each exhale.
- •Maintain the knee alignment in line with the toes; avoid the knee collapsing inward or excessive arching in the pelvis and lower back.
- •Lightly engage your core (abs) to support your lower back and maintain space in the hips.
Common mistakes
❌ Rounding the back
Why it's wrong: Pressing the chest down often rounds the back, which can strain the lower back and reduce the effectiveness of the stretch in the hips.
✓ Fix: Keep your back as straight and active as possible. Focus on lengthening the spine forward through the head.
❌ Hip rising too high
Why it's wrong: The hip on the back leg side may rise, which weakens the targeting of the desired muscles and can cause imbalance.
✓ Fix: Keep the pelvis as stable and level as possible. Lightly activate the glute of the back leg to keep the hip down.
❌ Forcing yourself too deep
Why it's wrong: Going too deep before your body is ready can lead to overstretching or even injury, and the stretch will not be relaxing.
✓ Fix: Listen to your body. Go only to the point where you feel a pleasant stretch, not pain. Breathe deeply and allow the muscles to gradually relax.
Frequently asked questions
How deep should I go into Lizard Pose?
Go only to the point where you feel a pleasant but effective stretch. The stretch should not hurt. Focus on breathing and allow your body to gradually relax deeper.
Can I do Lizard Pose daily?
Yes, Lizard Pose is safe and beneficial for daily practice, especially if your hip flexors are tight from sedentary work. Shorter holds for warming up or longer holds for recovery are well-suited for daily use.
What equipment do I need for Lizard Pose?
You may not need anything, but a yoga mat improves comfort. Yoga blocks can help if your hands don't reach the floor or if you want to deepen the stretch by supporting your forearms.
Why do I feel the stretch in different areas of my body?
Lizard Pose stretches several areas, such as the hip flexors, inner thighs, and glutes. The sensation can vary individually based on tightness. It is normal to feel the stretch where your muscles are tightest.
Safety tips
- Always listen to your body: Do not force yourself into pain. The stretch should feel pleasant, not sharp.
- Breathe deeply and evenly: Breathing helps relax the muscles and safely deepen the stretch.
- Start gently and gradually deepen: Allow your body to get used to the position and gradually deepen the stretch with each exhale.
- Avoid rounding your back: Keep your back straight and posture good to avoid straining your lower back.
- Use props if necessary: Yoga blocks or books under your hands can help maintain good alignment if the floor feels too far away.
Tags

Train smarter with AI coaching
Tsemppi's AI gives you exact weights and reps for every workout. Progress every single session.
Start your free 7-day trial✨ Limited spots available • No credit card required